Basic Recording
To use this feature, you will need to use a memory card. An SD card suitable for the monitor can be purchased from most electronic dealers.
- Insert the SD card into the slot on the side of the monitor.
- To record a camera picture, tap the Rec button on the screen. To stop recording, tap the Rec button again.
- To view the recorded clip, tap the following icons: Menu tab -> Info -> Notepad

- Select the day when you recorded the clip. (Days containing recorded video are highlighted.) The clip will be named with the recording time.
INFORMATION
Recordings that have been started manually will stop automatically after two minutes. Max 32 GB. When the SD- card is full, the recording stops and the card must manually be emptied.
Recording Settings
Tap the following buttons to get to the Recording Setup Screen: Menu tab -> Info -> Cogs -> Recorder Setup

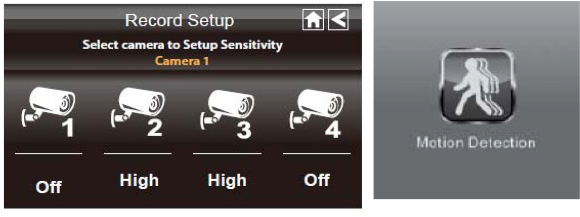
Motion Detection
E-mail Alert
It is possible to let the monitor send e-mails to you when the motion detection is triggered. You should be able to get the details necessary from your e-mail service provider.

Use settings below for email alert.
SMTP Server: smtp.gmail.com
SMTP Port: 465
Username: xxx@gmail.com
Password: *******
Email to: yyy@gmail.com
SSL checkbox checked
LUDA.farm recommends Gmail as sending address. Sending address (“Username”) and receiving address (“Email to:”) must be different.
Scheduled Recording
- Select the camera you would like to record.

- Tap on the hours or minutes and then use the up and down buttons to set start and stop time for your recording.
- To set the date, tap the blank field and then select the desired day from the calendar.
- Press Save.
It is possible to schedule five different recordings. Tap on the numbers to the right to select another recording slot.